Sunday 24 November 2013

Resident Evil Revelations - Raid Mode - General Advice


After 300+ hours of Revelations gameplay we have compiled a selection of general tips which are always useful when playing Raid Mode regardless of your character or skill level. As usual, we don't claim that this is an exhaustive list, but there are plenty of things we wish we'd known when we were at a low level, even as veterans of the 3DS version. We have mostly discovered these tips for ourselves, but a few have been adapted from ideas offered on various forums online. We hope that our tips are useful to you, whatever your goal. Happy gaming! :)

Combat Tips

Learning to dodge is an invaluable skill best mastered early. With practice you will soon learn to pre-empt attacks based on the body language of your opponent.

Some enemies have instant kill attacks that are impossible or extremely difficult to avoid even if you have full health. The most fearsome is the Hunter instant kill. The first sign that a Hunter is thinking about this is when he stretches his arms high above his head. If you do not shoot him at this point and distract/kill him, he will follow this with a screech and a high leap which will instantly kill you when he connects with his claw. If you are lucky it can be avoided, especially against baby Hunters who have less reach. Other instant kills include the Scagdead chainsaw attack. Don't get too close to them as they can grab you in their mouth and grind you against their chainsaw arm until you die. Wall Blisters only have one attack, and it is an instant kill in solo mode (in multiplayer, a quick witted partner can save you by shooting it as soon as it grabs you). If they get close enough to grab you, they will toy with you for a few seconds before twisting you to death.

If you hear the screech of a Wall Blister and need a second to compose yourself, throw a grenade near you. The grenade may knock it off course or stun it before it gets to you, giving you a vital second to find and shoot it. If it grabs you, the grenade explosion can knock you free and save you from certain death. There is no guarantee, but any kind of grenade may help you in an emergency.

In a low health state, be particularly cautious around fist enemies and any creature that can grab you and trigger a controller input command on screen. For example, Ooze, Fenrir and Rachael can do massive damage if you don't shake them off fast enough.

On the Results screen, the Damage stat refers to how much damage has been done to you, not how much damage you have done to enemies. So the smaller the number, the better.

The amount of damage done to an enemy is the number which is displayed on screen for a split second when you attack them. An orange/red number is usually a critical hit, which is higher than a yellow or white number from the same enemy. Critical hits are normally the weak point of an enemy and are often in their head area.

Don't waste valuable ammo on Aculeozzo (puffer fish that usually drop a Weapon Case). They are heavily armoured so melee attack them instead. It may take a while, but they aren't likely to hurt you much.

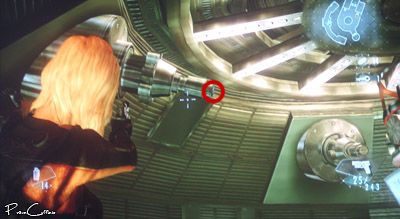
If you are using Charge Shot on a weapon, don't begin to charge your shot at a loading point (eg in an elevator or at a ship's wheel door). We learnt this the hard way, your shot will automatically fire when the area has finished loading and usually hit the door in front of you.

BP Saving Tips

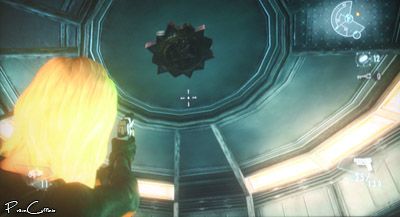
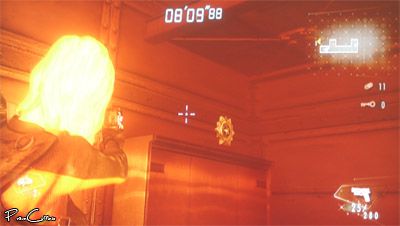
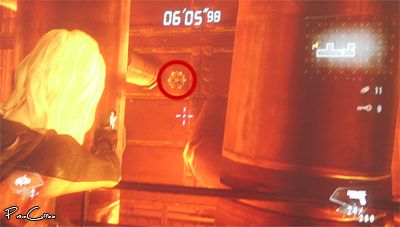
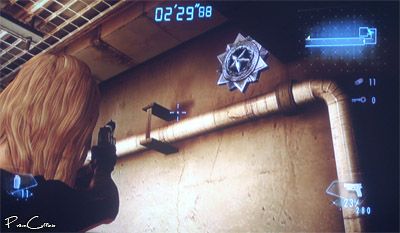
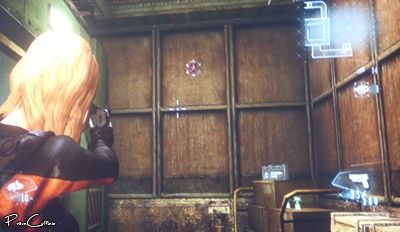
Fully charge your physical attack on the Goal medal for a free herb.

Don't reload your guns just before hitting the Goal medal - any used bullets in your clip will be replenished. eg. If you have 9 of 25 bullets in your clip when you hit the Goal, at the start of the next play you will have 25 of 25 bullets.

If you don't want to waste money buying bullets and are a decent level, take only the gun you want to refill to a low level stage. As you are only carrying one weapon all ammo pick-ups and drops will be for that gun. If you can melee attack everything in the stage and pick everything up, you will use no ammo and gain a lot. This is especially useful for expensive ammo like Magnum. We find that Airstrip on Chasm is a good level for this - fast, plenty of enemies and pickups and fairly low level. This also applies to grenades and herbs as well. Carrying a gun with a Bottomless Pouch and Fertilizer equipped can save valuable BP.

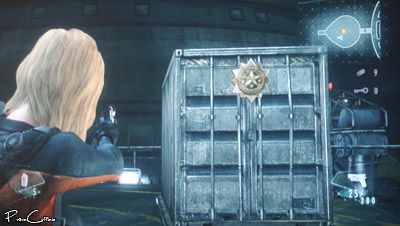
If you are trying to save for something in the store, check out our BP star walkthrough for details on how to find them. Depending on your experience and what stages you have unlocked, the best Chasm level is Airstrip (3840BP) and in Trench and Abyss, Mad Banquet has the highest (8160BP and 16480BP). The Ghost Ship at 100030 total BP is overall the best, but it is hard to get them all in one runthrough, it's time consuming, and you have to be a high level.

If you don't think that you can complete a stage without dying (if you are out of ammo or health or at risk of an instant kill attack), retire instead. Your BP and EXP will be slightly higher than if you die.

If you retire from a stage or are killed you will keep any weapons, parts and BP that you picked up. You will also have the same amount of ammo/grenades/herbs as you started with, no matter how much you use or pick up. This is especially useful if you are farming for weapons/parts and the item is only part way into a level, as you can retire after you pick it up and not waste time finishing the level if you don't want to. It can also save you a lot of money if you are only after weapons/parts because your ammo will restock. This is great, for example, if you are going through the Ghost Ship, which takes a lot of consumables. If you stock up before you start the level and only want a weapon, retire once you have picked it up and you can do it over and over again without having to spend any money on ammo/health.

Once you have unlocked the Firepower/Firing Rate/Capacity Boosts in the Store you can upgrade your guns. These are expensive, but they do make a difference, especially on already great guns. Be aware though that although you can purchase as many as you like, each gun can only be upgraded 30 times. This can be all the same boost or a mixture, but not 30 of each. The tag on the gun will reflect the changes you make to it, for example a "Grim Reaper" +11 has had 11 upgrades.

Bonuses

Don't rush your way through Raid Mode. There's no shame in making sure you're a higher level than recommended until you have amazing guns and parts. Genocide and No Damage Bonuses are also best left until you have more experience.

For the Low Level Bonus you need to be at the recommended level for a stage or below. If you adjust your level in the character menu all your guns and parts equipped will temporarily be downgraded too. Your guns may have smaller clips but you will be able to carry the same amount of ammo in the pouches as you could before.

To get a Trinity Bonus you need to get all three bonuses in one playthrough of a stage. These are Genocide (kill every enemy in the stage), Low Level (play at or below the recommeded level for that stage) and No Damage (take no hits from enemies).

The Ghost Ship

If you are trying to complete the Ghost Ship for the first time, do it at level 49 rather than 50. We found this out the hard way - at level 50 you get an extra hard enemy at the end after you destroy what you think is the Goal. Unless you kill the extra enemy the game won't register that you completed the Ghost Ship. At level 49 or below it won't appear and destroying the Goal counts as complete. After trying so many times to defeat everything and thinking you succeeded, it is soul destroying to be faced with yet another enemy when you have no herbs and about 3 bullets left!

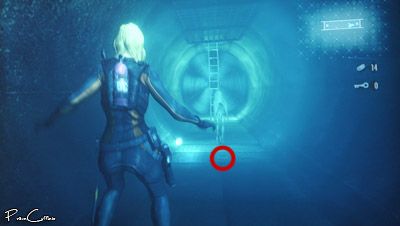
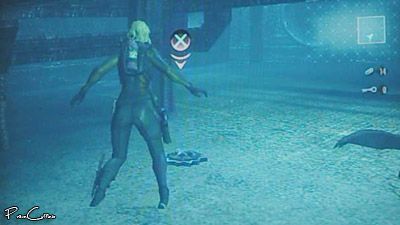
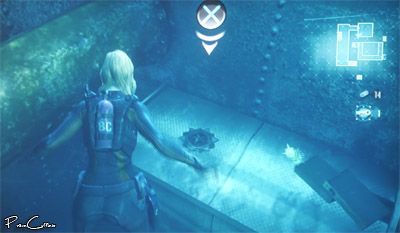
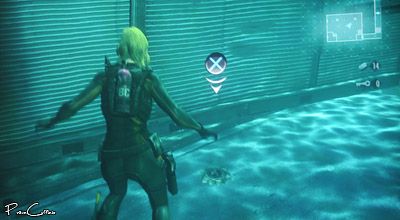
When playing the Ghost Ship, you appear to have unlimited lung capacity. For example, you can swim all the way from the Bilge Passageway to the Hold without needing to use the airholes. We haven't tested to see how long you can stay underwater, but a swim between areas without surfacing is no problem.

ResidentEvil.net Event Tips

The number one tip is don't try to beat everyone, just set yourself a realistic goal based on your level, experience and time available. To get very high on the rankings and achieve SSS ranks can often lead to the loss of many, many, many hours of your life! Sometimes an event will suit you, your style of play or your weapons and you may get a high rank easily, but most of the time you will have to work very hard and it may seem impossible. For example, we can work out from our results, people must play for 20 hours or more a day and do nothing else for months. We generally play from 9 or 10am to 5pm with plenty of breaks, and not always every day. This won't get you to number one, but it will get you decent rewards. It depends on the way you want to play and how much time you have.

If you retire from a stage or are killed, all kills and damage done to enemies still counts. When playing ResidentEvil.net events this is helpful as you can retire and not have to spend any money on consumables, however many times you play a level.

Damage Champion (Single Shot Damage)

Choose the gun with the highest firepower that you can - rifles and magnums are usually the best. Equip as many of the following parts as the slots allow - Damage, Charge Shot, Edge Runner (your score will go up significantly if you take a lot of damage), Infighter or Outfighter (depending on if you plan to be close to or far away from your enemy), Hunting Gear/ Dehumanizer/Poisonous Lure (which you equip will depend on the enemy you want to kill), Green Belt or Giant Rabbit's Foot (depending on if your enemy is weak or strong). Critical is also good if you have space for it, but it is not a guarantee of a higher score. You may not be able to equip all the parts, so decide which will give you the most advantage.

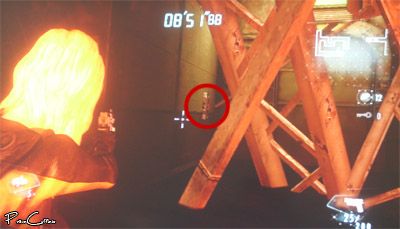
A great enemy to try for single shot damage on is the first Wall Blister on Crew Quarters Area 1 in Trench. If you are using Edge Runner, let the Ooze in the first room damage you. This will take a very long time if you are a high level but you can speed it up by taking a low level weapon equipped with Enrage and shooting them all once with it. Your character should be holding their side, the screen should have red around all the edges and small splatters of blood in the centre. Kill them all and go out into the corridor. Go down the stairs, sticking to the left wall. Turn carefully right to face and kill the baby Tricorn around the corner. Continue to stick like glue to the left wall of the corridor, follow the path around and forward until the Wall Blister appears. If you have done this correctly he will run forward slightly before getting stuck. He will barely move and this will give you a great shot at his critical point - his mouth. Beware though, if you get too close he will unstick himself and grab at you.

Our current set-up, which can get over a million damage points in a single hit is a Grim Reaper Level 47 +27 (all upgrades are on firepower). Our three slots are filled with Edge Runner 3, Charge Shot 2 and Hunting Gear 2. Using the above method, we can get just over 1.2 million with a good critical hit.

If you play online and have a willing partner with the Aura Of Strength part, they can boost your attack power significantly just by standing next to you.

If Rocket Launcher damage is counted, buy one and try it out. If you retire from a stage instead of hitting the goal, you will still have your Rocket Launcher and can repeat this as many times as you like without having to splash out more money. The Rocket Launcher's damage is dependent on your level, so at level 50 you do much more damage than at lower levels. Single large enemies are good - Rachael, Scagdead, even Hunters and Wall Blisters. The centre Scagdead in Mad Banquet on Chasm is good (you will probably kill the other two as well). At level 50 you can get 2-4 million from him, depending on if you get a critical hit.

Tower Of Doom (Total Damage)

Choose the gun with the highest firepower that you can - rifles and magnums are usually the best. Equip as many of the following parts as the slots allow - Damage, Charge Shot, Edge Runner (your score will go up significantly if you take a lot of damage), Infighter or Outfighter (depending on if you plan to be close to or far away from your enemy), Hunting Gear/ Dehumanizer/Poisonous Lure (which you equip will depend on the enemy you want to kill), Green Belt or Giant Rabbit's Foot (depending on if your enemy is weak or strong). Critical is also good if you have space for it, but it is not a guarantee of a higher score. You may not be able to equip all the parts, so decide which will give you the most advantage. Depending on the stage you are playing, some parts may be more hindrance than help. For example, a stage with fast moving enemies like Hunters or Fenrir may not be ideal for Charge Shot, especially if you don't have slots on the gun for everything you want. Some parts also come with the downside of a power decrease for certain enemies.

The trick here is to find the best level in terms of kills and length of time it takes. Take only your best weapon and all ammo pick-ups and drops will be for it. Try to get critical hits as much as possible and be as accurate as possible so you don't run out of ammo. For example, Terragrigia 1 on Trench has decent level enemies, 83 kills and takes less than 10 minutes if you are a high level. It also has only one kind of enemy - Beasts (Hunters and Wall Blisters) - so Hunting Gear is handy.

If Rocket Launcher damage is counted, buy one and use it against large enemies or groups. The Rocket Launcher's damage is dependent on your level, so at level 50 you do much more damage than at lower levels. Scagdeads are good targets, especially if they come in groups like Mad Banquet on Chasm, where it is possible to kill all three at the start of the level with one shot. It is possible to get 2-4 million from the centre Scagdead and about 1 million from each outer one in a single shot at level 50. If you retire from the stage instead of hitting the goal, you will still have your Rocket Launcher and can repeat this as many times as you like without having to splash out more money.

Killcount Challenge (Total Kills)

Kill as many enemies as possible in as short a time possible. This is much easier the lower their level and the higher yours. One shot kills are your friend. We have found that Airstrip on Chasm is great for a lot of kills in a short space of time - 48 in a few minutes.

Mano A Mano (Melee & Knife Attack Total Kills)

Kill as many enemies as possible in as short a time possible using melee and knife attacks. This is much easier the lower their level and the higher yours. We have found that Airstrip on Chasm is great for a lot of kills in a short space of time - 48 in a few minutes.

This guide was made using the PS3 version of Resident Evil Revelations and no other walkthroughs.

Please do not reproduce any or all of this guide anywhere without permission.

Saturday 10 August 2013

Resident Evil Revelations - Raid Mode - BP Star Walkthrough


This is a complete guide to all of the BP Score Stars hidden throughout the Resident Evil Revelations Raid Mode, including The Ghost Ship. We have included pictures of each star, including multiples where necessary.

We recommend that you have played through the relevant stage at least once before using our guide, because we do not hold your hand between stars or tell you what to kill, when or how. Our suggestions are, in our view, the most practical ways to obtain each star, but they are not necessarily the only ways. In some cases you can obtain them using a different method (eg. using grenades or guns instead of the knife). However, our suggestions minimize the need for too much ammo consumption.

We have included the value of each star after the description and a total stage value of all the stars after the stage title. This will help you decide which stages to attempt if you're saving for something in the store, whatever your level.

We have not included stars that enemies drop when you kill them, or any extra stars you may collect with Metal Detector equipped. This walkthrough is purely for physical stars hidden around the environment, as we assume and suggest that you kill everything in an area before obtaining the stars safely. This will also enable you to obtain the Genocide Bonus for each stage. However, you can get the stars without killing a thing, especially once you know where they are.

Some stages have a time limit which makes collecting stars more difficult. However, we have managed to obtain all stars and still complete those stages with time to spare. Any time displayed in our pictures should not be used as a guide, as we played through numerous times to find the stars at the expense of completing the stage.

If your playing style means that you throw a lot of grenades, you may find that you accidentally blow up the star before you even see it. We discovered this through experience while writing this walkthrough :)

We hope that our guide is useful to you. Please enjoy!

Chasm

Stages 1-5
Stage 1 - Crew Quarters Area 1 - 1150BP
Stage 2 - Beach - 800BP
Stage 3 - Crew Quarters Area 2 - 1450BP
Stage 4 - Snowy Mountain 1 - 1600BP
Stage 5 - Guest Cabin - 1200BP

Stages 6-10
Stage 6 - Promenade Deck - 2320BP
Stage 7 - Terragrigia 1 - 1400BP
Stage 8 - Crew Quarters Area 3 - 2050BP
Stage 9 - Bilge Block - 1620BP
Stage 10 - Snowy Mountain 2 - 980BP

Stages 11-15
Stage 11 - Semiramis - 980BP
Stage 12 - Observation Deck - 320BP
Stage 13 - Side Deck - 2700BP
Stage 14 - Flood - 2970BP
Stage 15 - Zenobia - 3040BP

Stages 16-20
Stage 16 - Airstrip - 3840BP
Stage 17 - Laboratory - 2420BP
Stage 18 - Emergency Passageway - 2200BP
Stage 19 - Terragrigia 2 - 1320BP
Stage 20 - Mad Banquet - 3700BP

Trench

Stages 1-4
Stage 1 - Crew Quarters Area 1 - 3720BP
Stage 2 - Beach - 4380BP
Stage 3 - Crew Quarters Area 2 - 4050BP
Stage 4 - Snowy Mountain 1 - 4450BP

Stages 5-8
Stage 5 - Guest Cabin - 3240BP
Stage 6 - Promenade Deck - 5070BP
Stage 7 - Terragrigia 1 - 3980BP
Stage 8 - Crew Quarters Area 3 - 5400BP

Stages 9-12
Stage 9 - Bilge Block - 5670BP
Stage 10 - Snowy Mountain 2 - 3900BP
Stage 11 - Semiramis - 2720BP
Stage 12 - Observation Deck - 1950BP

Stages 13-16
Stage 13 - Side Deck - 6300BP
Stage 14 - Flood - 6930BP
Stage 15 - Zenobia - 3740BP
Stage 16 - Airstrip - 7520BP

Stages 17-20
Stage 17 - Laboratory - 7620BP
Stage 18 - Emergency Passageway - 4900BP
Stage 19 - Terragrigia 2 - 540BP
Stage 20 - Mad Banquet - 8160BP

Abyss

Stages 1-3
Stage 1 - Crew Quarters Area 1 - 9640BP
Stage 2 - Beach - 7830BP
Stage 3 - Crew Quarters Area 2 - 8580BP

Stages 4-6
Stage 4 - Snowy Mountain 1 - 11040BP
Stage 5 - Guest Cabin - 12760BP
Stage 6 - Promenade Deck - 8270BP

Stages 7-9
Stage 7 - Terragrigia 1 - 8270BP
Stage 8 - Crew Quarters Area 3 - 12460BP
Stage 9 - Bilge Block - 12800BP

Stages 10-13
Stage 10 - Snowy Mountain 2 - 3120BP
Stage 11 - Semiramis - 5000BP
Stage 12 - Observation Deck - 2180BP
Stage 13 - Side Deck - 11460BP

Stages 14-16
Stage 14 - Flood - 12780BP
Stage 15 - Zenobia - 7830BP
Stage 16 - Airstrip - 3860BP

Stages 17-20
Stage 17 - Laboratory - 13190BP
Stage 18 - Emergency Passageway - 15990BP
Stage 19 - Terragrigia 2 - 6300BP
Stage 20 - Mad Banquet - 16480BP

Bonus Stage - 100030BP

The Ghost Ship - 100030BP

This guide was made using the PS3 version of Resident Evil Revelations and no other walkthroughs.

Please do not reproduce any or all of this guide anywhere without permission.

Resident Evil Revelations - Raid Mode - BP Star Walkthrough - Bonus Stage - The Ghost Ship


The Ghost Ship is an excellent way to collect a lot of BP in a relatively short space of time. There are a total of 21 score stars hidden throughout the map, split into three different values (710BP, 3580BP and 10000BP).

Everybody plays Ghost Ship differently, depending on their overall goal. However, our typical run-through is a farming trip to collect the majority of the stars, plus two weapon cases (on the Side Deck and Bridge) and three custom parts (Laboratory, illegal parts on the Side Deck, and Upper Cabins). It is difficult to provide a linear walkthrough for each star, so we have roughly based our guide on the order you visit the locations in Raid Mode.

Our usual route is Crew Quarters Area - Casino - Bilge Passageway - Hold - Epidemic Prevention Block - Laboratory - Emergency Passageway - Side Deck - Bridge - Upper Cabins - Deck and earns 70030BP (we usually run through the Side Deck but there is another 10000BP there as well). This route avoids too many of the instant kill type of enemy (but not all) and is relatively safe for any competent player at a decent level with decent guns and parts.

Upper Cabins - 10710BP

In the room marked "Toilette" on the balcony, enter and turn right. The star is very well hidden behind the bright white light between the two broken mirrors. 710BP


Around the corner from room 302 is a wall safe. The star can be picked up from inside it. 10000BP


Lower Cabins - 4290BP

In the Cafeteria, enter the Anchor door at the top of the small set of stairs. Turn right and aim up and the star is on the ceiling (we have circled this in red). 710BP


In room 200 enter the bathroom. The star is on the wall behind the shower curtain. You can hit this with your knife. 3580BP


Promenade Deck - 13580BP

To get this star you must enter the Promenade Deck from the Hall rather than the elevator on the Bridge/Deck. Turn right and follow the path through the doors, until you reach the Promenade Deck. Make your way to the lower level via the stairs before using the shutter (you can't get back to this area once you've gone through). Head into the tiny room with shelves and the Lifebuoy door. Turn 180 degrees after entering and the star is behind the open door you just came through. You can hit this with your knife. 3580BP


You can get this star whether you enter the area from the Hall or the elevator. On the lower level of the Promenade Deck, face the double Lifebuoy doors. The star is under the awning to your right. 10000BP


Casino - 710BP

Coming into the Casino from the surveillance room, head down the stairs towards the balcony ahead. Turn right down the far row of Neptune's Wave machines and the star is to your right, between the last two machines. This can be picked up. 710BP


Hall - 710BP

Head for the top floor of the Hall. Move in either direction around the path until you are behind the huge clock. Aim up and the star is high on the decorative wall, above the arch (we have circled this in red). Because of its colour, it is well hidden. 710BP


Solarium - 710BP

Climb to the top of the diving board in the Solarium and turn 180 degrees. The star is on the ground of the semi-circular platform ahead of you (we have circled this in red). 710BP


Observation Deck - 710BP

Take the elevator in the Hall to the Observation Deck. Walk around to the right until you see a square hole in the ceiling near the bins. Aim up and the star is on the ceiling of the room above (we have circled this in red). 710BP


Epidemic Prevention Block - 4290BP

After leaving the flooded Hold using the old key on the underwater door, swim until you reach the flooded stairwell guarded by two Sea Creepers. Swim to the bottom and the star is on a shelf to the left of the blocked door. You can pick this one up. 710BP


Enter the Epidemic Prevention Block and turn right and jump through the broken window. Turn left and head towards the fingerprint registration device. The star is on the top shelf of the bookcase above the computer. 3580BP


Laboratory - 13580BP

Enter the central circular area of the Laboratory with the red viral tank. Head to the unopenable elevator at the far end and turn 180 degrees. Look right and the star is on the edge of the metallic platform (we have circled this in red). 10000BP


From the central circular area, look towards the large door which led you to the Laboratory. The star is under the walkway (we have circled this in red). 3580BP


Emergency Passageway - 17160BP

In the area with two Ooze and a burning door, drop down to the water below. Turn left and the star is in the corner of the room to the right of three pipes to your left. 10000BP


In the L-shaped corridor after the room with exploded boilers (there is sometimes an Armoured Ooze at the top of the steps here), turn left immediately after coming through the door. The star is high up on the wall here. 3580BP


After leaving the L-shaped corridor (this loads the next area), you will be on a walkway high above some flames. Move about halfway along the walkway and turn 180 degrees. The star is above the door you just came through. You may need to back up if you can't see it. 3580BP


Side Deck - 10000BP

Once you reach the Side Deck, move along the deck until you are under the overhead lifeboat. Turn 180 degrees and the star is high on the wall above the covered area (we have circled this in red). The best way to spot this is to stand beneath the propeller of the lifeboat and aim up through the gap in the objects on top of the covered area. 10000BP


Bridge - 13580BP

In the Conference Room underneath the Bridge, the star is in the wall safe directly opposite where you enter. You can pick this up. 3580BP


On the Bridge, when facing the windows, the star is on the floor behind the left side of the main smouldering console. 10000BP


Deck - 10000BP

There are two ways to get this star, depending on whether you wish to fight the enemies on the Foredeck or not. If you do want to fight them, step out onto the helipad. Turn to the right and look down over the railings to the base of the crane. It is very well hidden on the ground of the lower area that you can't get to, and is easy to miss during the heat of battle. If you can't see it, you may need to adjust your position until you do.


Alternatively, from the safety of the walkway outside the lounge area of the Deck, you can shoot this if you are carrying a sniper rifle. Stand next to the floodlight on your right as you look at the helipad. Aim and fully zoom through the railing towards the base of the crane and the tank next to it. You should just see the glimmer of the edge of the star (we have circled this in red). Your sniper's aim marker will light up when the shot is on. This is actually when your crosshairs are aimed slightly above the piece of the star you can see. You may need a couple of attempts, but it is possible to hit it. 10000BP


Tuesday 6 August 2013

Resident Evil Revelations - Raid Mode - BP Star Walkthrough - Abyss - Stages 17-20


Stage 17 - Laboratory - 13190BP

From the start of the stage look up and left. The star is on the end of the neutralising agent gun on the ceiling (we have circled this in red). You can also get this from the inner area. 2350BP


After using the old key, enter the office space. The star is above the metallic unit immediately to your right as you enter. 480BP


In the Morgue, the star is under the table to the left of the exit door. 480BP


Once you exit the elevator, move carefully around the laser room, dropping down a small ladder. Move towards the window and turn left. The star is on the floor to the right of a metal chest with a green herb on top and can be picked up. 480BP


Once you have used the old key you will enter an area where Wall Blisters attack (help!). Make it by any means necessary into the tiny circular room beyond this and before the goal area. The star is on the ceiling above you. 9400BP


Stage 18 - Emergency Passageway - 15990BP

In the partially flooded corridors there will be a big explosion in front of a door and a fist Hunter will attack. Move towards the now fallen girders blocking that door and the star is on the left wall just behind them (we have circled this in red). You can also get this from a distance before triggering the explosion. 520BP


When you drop down to the area where you have to turn the valve to stop the steam, immediately turn 180 degrees. The star is on your left beneath the platform you jumped from. 2480BP


Once you have stopped the steam, continue along the path (beware of the Wall Blister). The star is to your left between the fourth and fifth vertical pipes (we have circled this in red). 520BP


After climbing the very long ladder, immediately look up and right and the star is on the wall above a pipe. 2480BP


Once you reach the Side Deck, move along the deck until you are out from under the covered area (this is just before you get to the hanging lifeboat). Turn 180 degrees and aim up and left. The star is on the wall high above the covered area you just came from (we have circled this in red). If you can't see it, back up slightly. 9990BP


Stage 19 - Terragrigia 2 - 6300BP

Use an old key to enter the stairwell and go up to the fourth floor. Enter the corridor and move around to the right. The star is on a wall behind a red Danger sign. 400BP


Enter the locker room and head for the exit door. The star is behind a folded table leaning against the wall to the right of the door. You can pick this up. 2550BP


Use an old key to enter the small storage room on the side of the corridor marked M3-2 on the third floor. Go around the shelves to the left and turn 180 degrees to see the star behind a chair. You may need to back up a bit to see it. 400BP


In the entrance hall, head downstairs and go behind the reception desk. The star is underneath the desk slightly to the left of centre (we have circled this in red). 400BP


In the Command Room, head down the furthest left aisle between the desks. The star is on the bench of the desk nearest the front. 2550BP


Stage 20 - Mad Banquet - 16480BP

From the entrance, walk to the right and find the chair trapped under a rock to the left of a pillar. The star is on the floor beneath the chair and can be hard to spot (we have circled this in red). Stand slightly to the left of the pillar and walk backwards until you can see it. 9900BP


From the entrance, head to the far right corner. The star is high on the wall to your right, above the walkway and to the left of a pillar. 4950BP


From the entrance, head left and around the pile of wooden debris. Turn to face the wall with the double doors and the star is on the floor in the middle of the mess (we have circled this in red). 1630BP


Resident Evil Revelations - Raid Mode - BP Star Walkthrough - Abyss - Stages 14-16


Stage 14 - Flood - 12780BP

From the start of the stage, turn right and head up the ladder. Follow the tunnel and jump into the water. The star is on the floor of the water-filled passage, under the Sea Creeper (we have circled this in red). You can pick this up without throwing a Pulse Grenade, although that does make things easier. 350BP


From the start, jump into the water and swim straight down to the bottom. The star is on the floor at the bottom centre of your map. Be careful not to run out of air! 2280BP


From the start, jump into the water, dive down and take the door on the left (this is at the top of your on-screen map). Follow the path, through the doors, using airholes when necessary. Once you reach the bulkhead control room, swim through the broken window and turn immediately right. Swim through a smaller broken window and swim forwards, following the path around to another door. Swim through the next room into an area with stairs and an airhole. Swim through the door here to enter a water-filled area with metal gates at either end (these lead to the upper and lower levels of the Engine Room). Take the gate at the left end, into the lower level, following the walkway around and exit the other door on the same level. Swim up and right, then right again into the end door (this is a locked door in the Bilge levels of Raid). Swim around the large tank and the star is on top of a low metal cupboard, next to a Pulse Grenade. Don't forget to use airholes when necessary! 350BP


Once you have an old key, make your way back to the start of the stage and go through the double doors. Follow the passage to the end and the star is on the wall to the right of the elevator. 350BP


Enter the flooded Hold and swim forward under the container. Turn immediately left and the star is resting on top of another container. You can pick this up. 350BP


In the room with the giant fish tank, head towards the goal area and face right. The star is on a girder with electrical wires hanging from it. 9100BP


Stage 15 - Zenobia - 7830BP

Use an old key to enter the Emergency Communication Room (upstairs, behind the giant clock in the Hall). The star is between the smouldering console and some tall computer equipment, opposite the Weapon Case. You can pick this up. 180BP


In the Upper Cabins, enter room 302 using an old key (this is where you find the shotgun in Campaign). Move around the bed and the star is on the wall to the right of the bedside cabinet (watch out for the Pincer in the closet!) and can be hit with your knife. 850BP


Right at the end of the stage, on the helipad on the Foredeck, the star is on the door on the rear of the container. You can hit this with your knife. 6800BP


Stage 16 - Airstrip - 3860BP

After the bunk room, follow the path around and down. At the bottom of the stairs look to the right and the star is on the wall to the left of a pipe. 510BP


After you exit the elevator, head forwards to the power supply unit with cables coming out of it. Stand with your character's shoulder to the crate and the star is on the floor in the gap between the unit and the crate. You can pick this up if you get close enough. 510BP


After you exit the elevator, head forwards and climb onto the crate. Turn left and you will see the star on the wall above two stacked metal crates opposite you. 2330BP


After you exit the elevator, head forwards and left to the platform where the goal spawns. The star is hidden underneath on some boxes on the opposite site to the ladder and can be picked up. 510BP


Resident Evil Code Veronica guns Jill Valentine Chris Claire Redfield mansion Albert Wesker Sherry Annette William Birkin Tyrant Mr X zombie Alexia Alfred Ashford cerberus movie film Mila Milla Jovovich Sienna Guillory Colin Salmon Michelle Rodriguez Nemesis cop licker Carlos Olivera costumes cosplay role play stars S.T.A.R.S. Chief Irons sewers aligator Police Station Game Cube PlayStation PS1 PSX PS2 XBox 360 PS3 train lift Umbrella puzzle Rebecca Chambers Brad Vickers chickenheart helicopter rocket launcher herbs Ada Wong flame acid rounds snake Barry Burton Alice Leon S Kennedy Steve Burnside monster survival horror master of unlocking lockpick Moonlight Sonata Japanese Japan Biohazard weapon t minus T-virus g-virus virus detonation key berreta magnum colt python Ivy elevataor Raccon City Spencer Arklay Mountains incident forrest forest shield medal groan church clock tower Capcom RE 1 2 3 4 5 6 CV RE1 RE2 RE3 RE4 RECV RE5 Helena Harper Piers Nivans Jake Muller Walkthrough Walk Through Game Guide Apocalypse Extinction Afterlife 3D